
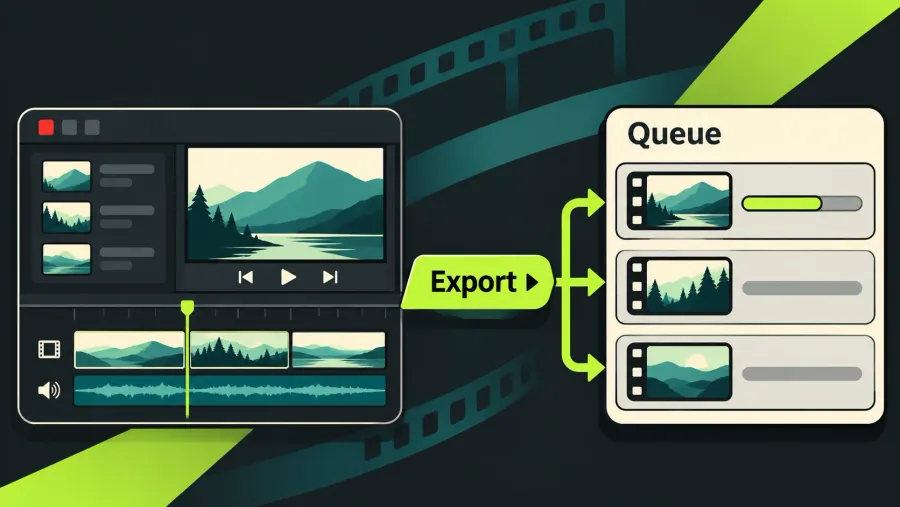
To batch export in Lightworks 2026, open the full Export panel, expand the Source list, add the sequences, clips or subclips you need, check each item's settings, then click Start Export. The exports run as background tasks; follow them in the project's Tasks page and Tasks Log, then play the finished files outside Lightworks. I'd run one short test before a long batch because a wrong range or destination is much cheaper to catch in one file.
The queue is a list of separate deliveries. Choose a sequence for a finished edit, a clip for source footage, or a subclip for an excerpt you've already defined. Adding several items does not join them into one movie.
Decide what the queue should deliver
Before opening the export list, write down the files you expect to receive. Include the source object, range, output settings and final name. That gives you something to compare with both the queue and the destination folder.
| Delivery | Source to add | Example name | Check first |
|---|---|---|---|
| Finished interview | The interview sequence | Interview_v04_master_1080p | Full intended duration, mix and monitored video tracks |
| Separate cutaway shot | The required source clip | Cutaway_02_v01 | Correct source and whether its original audio belongs in the delivery |
| Selected answer from a long recording | The prepared subclip | Answer_03_v02 | Subclip boundaries and online source media |
For this example, the finished queue should contain three items and produce three separately identifiable files. Use your own delivery specification for resolution and frame rate; the names are examples, not export presets.
Exporting a sequence gives you its assembled edit. It does not turn every timeline segment into a separate delivery automatically. If you want separate shots, prepare the actual clips or subclips you need. If you're unsure which edit the panel is pointing to, resolve that first with the export source-list and range checks.
For two encodes of the same sequence, I'd use two explicit export passes: finish the first, then select the same source with the second preset and a different destination name. That keeps the source, settings and resulting file clear without depending on duplicate entries in the list. Several already prepared sequences, clips and subclips can go into one batch.
Run a short test before the batch
Choose a short passage containing a cut, movement and representative audio. Use the same format, resolution, frame rate and destination drive planned for the delivery. A successful low-resolution test does not settle whether a different full-resolution preset will work.
- Open the full panel and its list controls. With the intended sequence open, choose Export from the timeline's Tools side menu. Switch to the Export layout for the Project Contents export buttons used below. Use the full panel rather than a quick preset with Auto start enabled, which can begin rendering as soon as you choose it.
- Make the test source unambiguous. Expand Source, clear old entries with Clear Export List, select the intended sequence in Project Contents and use Add to Export List. Check that the list contains only that source.
- Limit the test range. Put In and Out around the test passage and choose Region → Selection → Marked section. Confirm the boundaries belong to the chosen sequence.
- Set the output before starting. Choose the delivery preset or Custom settings. In Destination, check Name and Folder; give the test its own name, such as
Interview_v04_test. For a local-only delivery, keep Cloud set to None. - Click Start Export. Wait for the task to finish, then open that exact file from the destination folder in a separate player. Check its beginning, end, cut, picture, audio and sync.
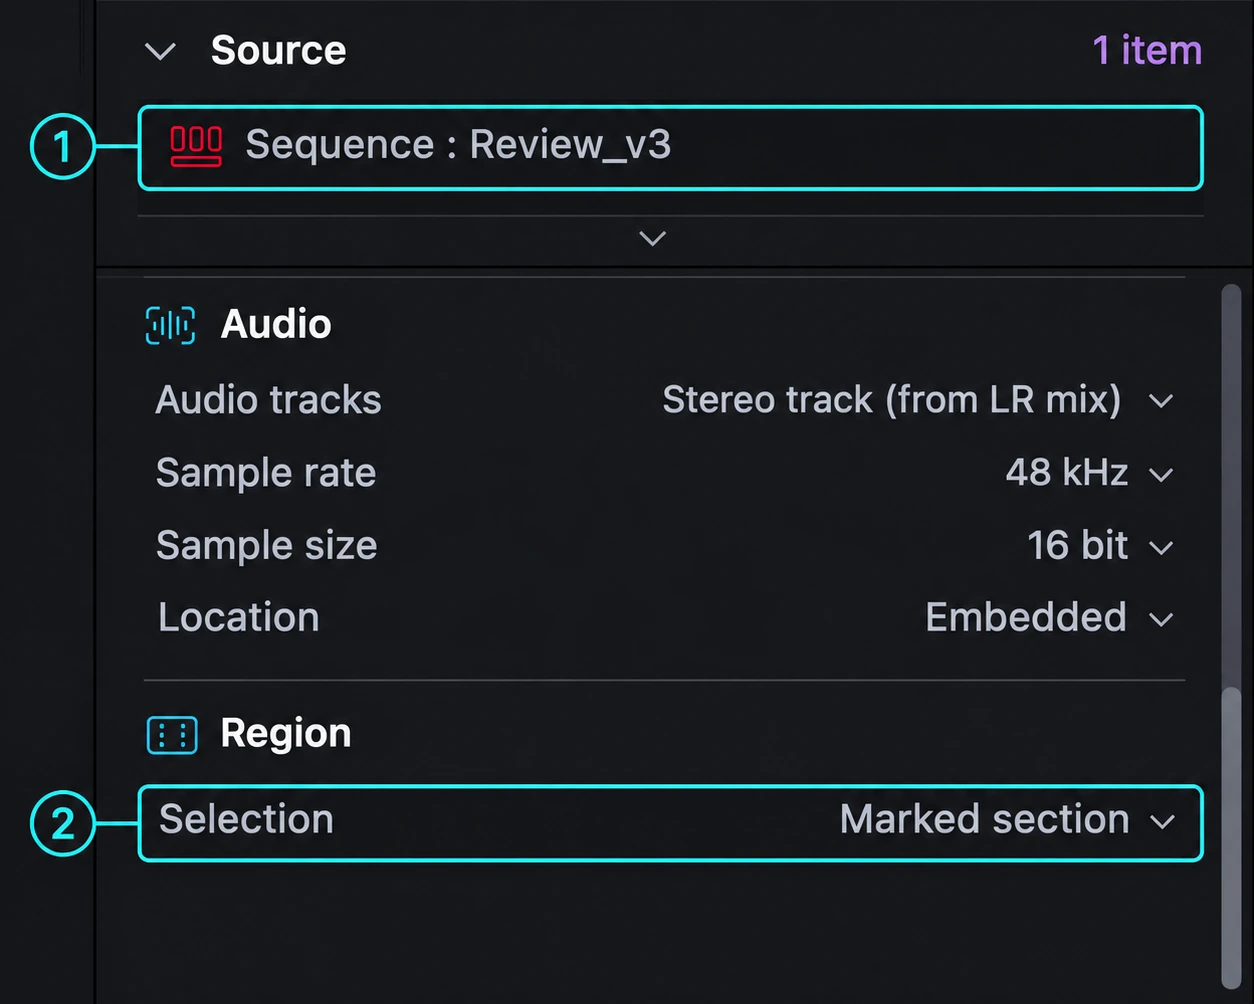
Restore the delivery range after the test. Before queuing the full sequence, change Region back to the intended whole-item range, or set the final In/Out boundaries for a deliberate excerpt. Check the duration again. A perfectly rendered ten-second test is still the wrong result if the delivery should be ten minutes.
The batch-export guidance recommends a short test before a large delivery. If the test fails, fix that source, setting or destination before adding the rest. If other batch items use a different codec or come from different media, test those differences too.
Build and clean the Source Export list
Once the test passes, clear its entry and build the delivery list from your file plan. Stay in the same project for this batch.
- Open the Export layout and expand Source. Keep the list visible while preparing the outputs so you can see what is being added.
- Use Clear Export List for a new delivery. Start with an empty list rather than assuming the previous test or job has gone.
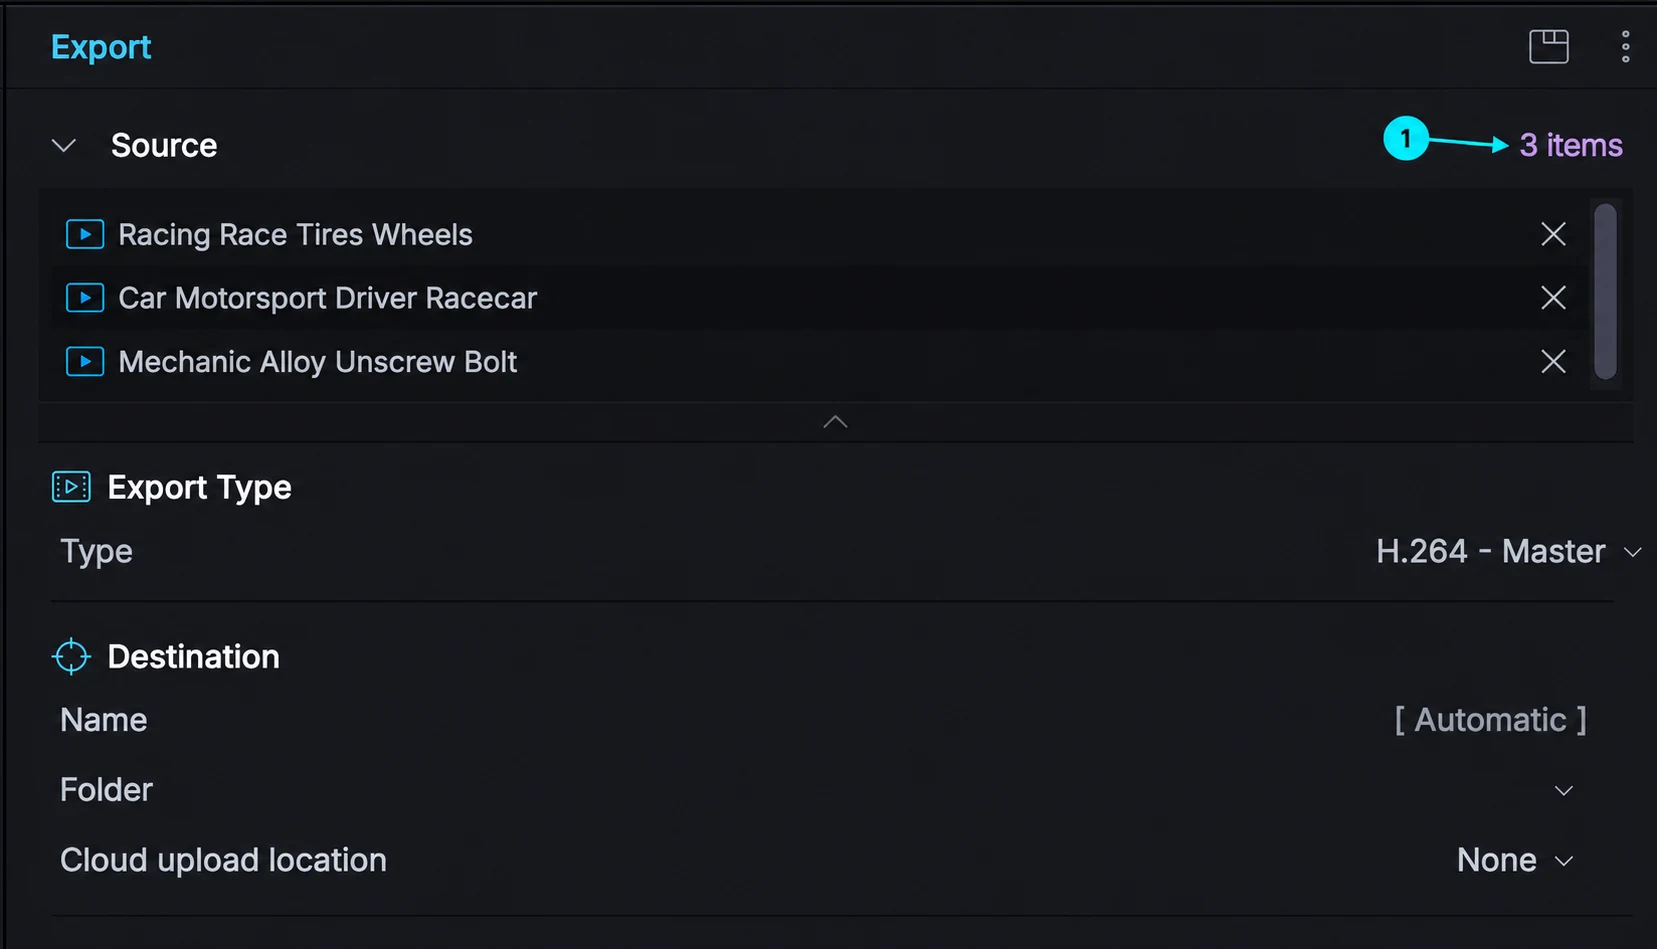
- Select the exact items in Project Contents and choose Add to Export List. The current Export layout also supports drag-and-drop and automatically adds a clip or sequence loaded into the viewer. Inspect the list before adding something again.
- Compare the count and identities with your plan. For the three-file example above, find the interview sequence, cutaway clip and answer subclip, once each. Check names and ranges, not just similar-looking thumbnails.
- Resolve unexpected rows before rendering. If you can't confidently distinguish a leftover from an intended output, clear the list and rebuild it from the known items. A small, certain queue is easier to verify than an ambiguous one.
Add to Export List has an important fallback: with nothing selected in Project Contents, it adds what's loaded in the source viewer. Select the intended object first. Reveal Timeline loads the active sequence into the viewer; it helps you identify that edit, while the Source list still needs its own check.
Check each item, then start the batch
The current batch workflow assigns settings or a preset to each queued item. Select each entry and review its displayed choices. Don't assume that checking the first row checks the rest.
| Per-item check | What to confirm | What it prevents |
|---|---|---|
| Source and Region | Sequence, clip or subclip identity; whole item or intended marked section; expected duration and boundary frames | An old edit, raw clip or test range replacing the delivery |
| Preset, format and codec | The receiving platform accepts the selected output, and your licence offers it | A technically finished file that doesn't meet the delivery specification |
| Resolution and frame rate | Required size and rate for this item; inspect what a preset or Same as Source selects | An unintended conversion or a setting above the plan's ceiling |
| Destination Name and Folder | A distinct name for every output, a known local folder, enough free space and the intended Cloud choice | Conflicting names, files saved elsewhere or an unwanted upload |
| Track output | Required video tracks, audio mix and subtitle burn-in choices | Missing picture, silence or captions absent from the final file |
| Media availability | Original source drives remain connected and the needed files are online | A failed export or lower-resolution proxy material in the delivery |
For a straightforward web delivery, I'd start with MP4 and keep each sequence's frame rate unless the delivery specification calls for a conversion. Use the export settings guide for codec and quality choices; this queue check makes sure those choices belong to every intended file.
Use distinct versioned names, even when two sources have the same title. For example, distinguish Interview_v04_master_1080p from Interview_v04_review_720p. Check the folder for existing files before starting, and choose a new name for a retry. Do not rely on an automatic suffix or an overwrite prompt to keep deliveries apart.
Track state matters even when you export a sequence directly from a bin. The export rules respect video Monitor and solo choices, and audio mute and solo for a mixed output. Separate-track audio outputs still include muted tracks, so muting a track doesn't remove its stem. For burned-in subtitles, monitor the subtitle track and enable Subtitles under Overlays in the Export panel.
Reconnect originals before final delivery. Lightworks normally uses original media for export, but its proxy guidance allows export from available proxies when originals are offline. Smooth proxy playback is not a check of the final source quality.
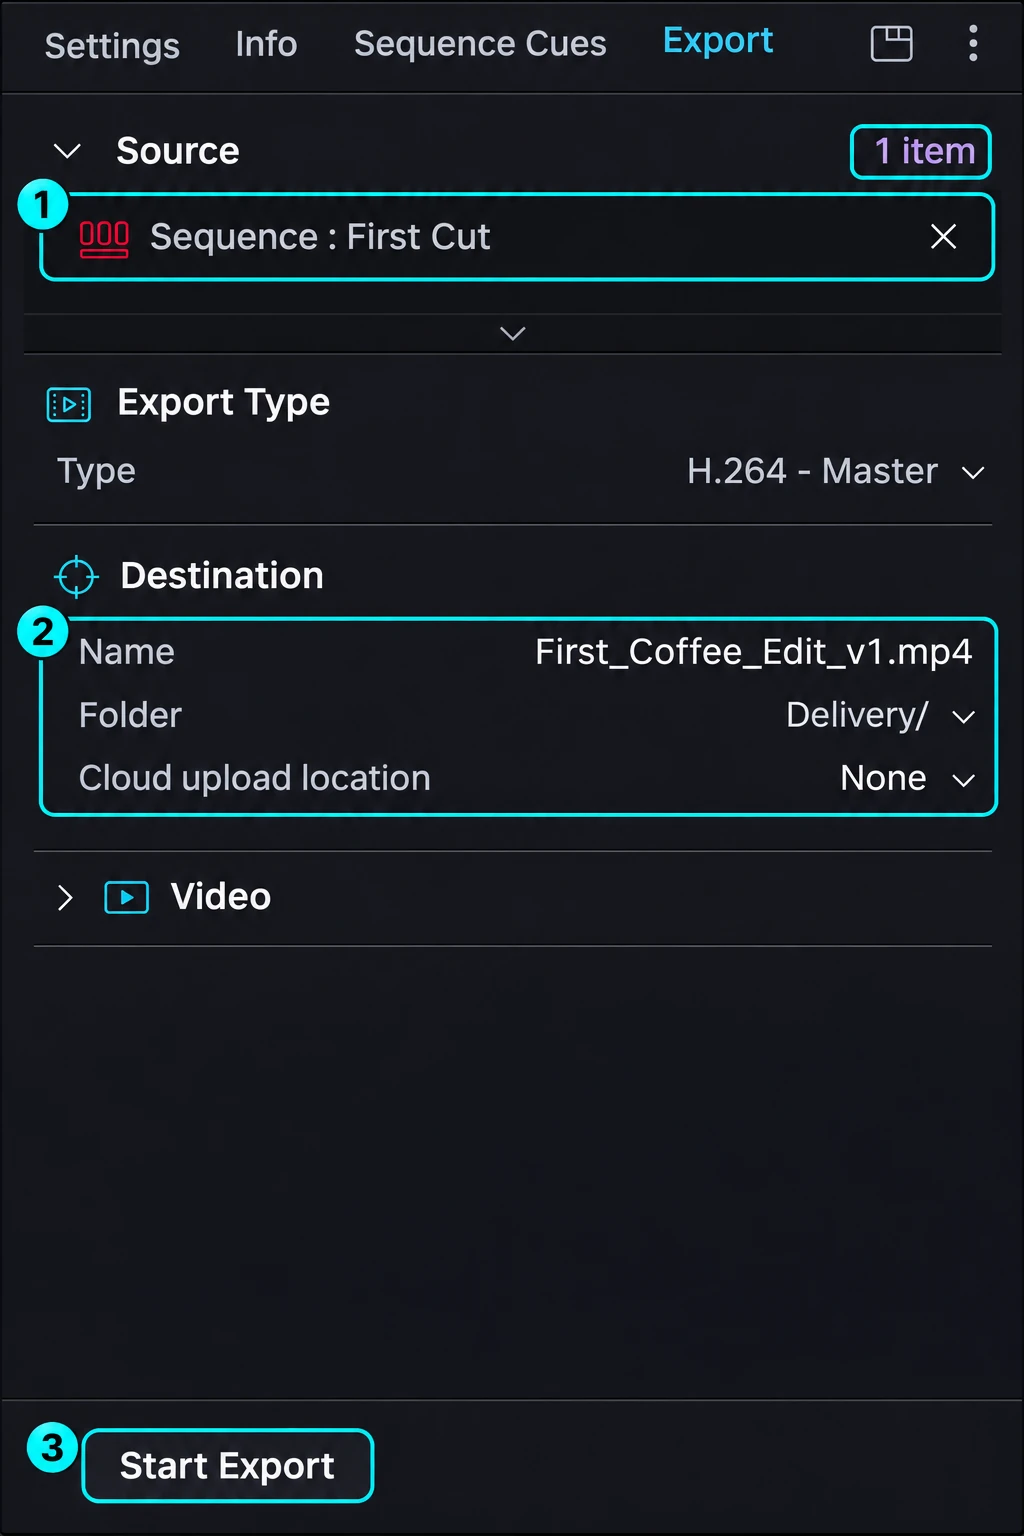
After checking every entry, click Start Export. Open Tasks and confirm that work has started for the intended project. Keep the source drives and destination available until rendering finishes. The list is the preparation stage; the background tasks show the work being carried out.
Watch Tasks and the Tasks Log
Open the project's settings panel and choose Tasks. The Project Settings reference places background work here; it is separate from the application's preferences.
- Tasks shows work in progress, with states such as running, pending and paused. A pending entry is waiting, so don't treat it as a completed file.
- Tasks Log records completed work. Use it to find which exports finished and which need attention.
- The project card's progress ring indicates that background work is running for that project. It doesn't confirm the contents of a delivered file.
Lightworks can keep working while exports render in the background. I'd leave the delivery sequences and their media alone until the batch finishes, so you don't introduce another change while inspecting the results. A queue saves repeated setup and supervision; its presence isn't evidence that rendering is faster.
Fix a failed item without restarting blindly
First identify the source and error reported by the task. Keep completed, checked deliveries apart from failed or unfinished work. A problem in one output is a reason to inspect that item before rebuilding the entire batch.
| What failed | Next action | Check before retrying |
|---|---|---|
| Source media is offline | Reconnect the source drive or relink the correct originals | The expected clip plays at the problem position and is the correct media version |
| The destination has no space | Free space without deleting source media, or choose another destination drive | A short test completes in the intended folder |
| One particular clip fails | Check that clip in the sequence; relink or replace the affected media as appropriate | A short export around the failing section completes before retrying the full item |
| The file is complete but wrong | Recheck source, range, tracks and output settings | The corrected test file contains the intended picture, duration and sound |
Those first three error branches follow the documented batch-export troubleshooting steps. For an error that needs a wider diagnosis, follow the export-failed checks before changing several settings at once.
If you abort a task, read the confirmation carefully: it can ask about stopping one task or all tasks. Aborting an export discards that render. After an abort, read the results window for the failed items and how many were never reached; don't count those as successful outputs. Clear the old source list and build a retry list only from the items still needed, with new file names.
Verify the files, not just the queue
Once the work has finished, compare the destination folder with the original delivery plan. The three-item example is complete only when the interview, cutaway and answer files all pass their own checks.
- Match each file to its source. Confirm the name, destination and version. Open the newly exported file, not an older file still loaded in your player.
- Check boundaries and duration. Inspect the first and last frames and confirm the full intended sequence or excerpt is present.
- Inspect the required output. Check resolution and frame rate in the file's properties or media information, then play it. A plausible file name doesn't establish its technical settings.
- Check picture and sound through the file. Include cuts, effects, titles, music, speech and sync, plus any known difficult passage. Confirm subtitle burn-in if it was requested.
- Account for missing outputs. Compare Tasks Log and any error or abort report with the plan. Retry the missing or failed deliveries; keep the verified successes.
A completed task confirms that an export finished. Your playback and delivery checks establish whether it is the right file to hand over.
Plan, version and project boundaries
The current Lightworks plan comparison lists export ceilings of 1080p for Free, 4K for Create and 8K for Pro. Professional and broadcast delivery codecs require Pro. A queue or Same as Source preset doesn't extend those entitlements, and a higher resolution alone doesn't repair soft source footage.
These steps follow the combined Export panel in Lightworks 2026. Older bin-export tutorials can still explain why you would export several items, but their menus, shared settings and naming behaviour shouldn't replace the current panel checks. Use the official release page when identifying the installed generation and its release notes.
Several sources in one project are the supported workflow here. Background tasks must finish or be aborted before you can exit that project. Finish and verify its deliveries, then open the next project and prepare a fresh batch there. Don't start concurrent copies of Lightworks or move shared media into a temporary export project just to follow an old workaround.